April 3, 2007
Technique Tuesday: Copper Sheet Embossing
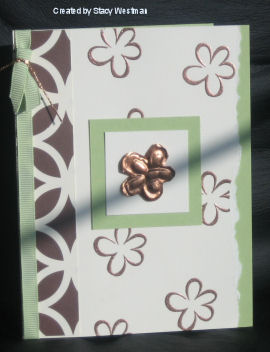
This card uses a roll of thin copper sheeting that I purchased at Michaels. It comes with a handy wooden embossing tool. This took some practice to do; I’d gone through 3 pieces before this one worked the way I had envisioned. First, cut a small piece of the metallic sheet. Next, position and hold tightly against the rubber side of a stamp. I used Bold Butterfly stamp set; I tried using this technique on some finer, more detailed images, and it didn’t work out. Next, use the wooden embossing tool that came included in the package and push against the rubber stamp through the metal. The metal will push in where there is dead space and be left raised where the stamp is raised. I trimmed out this flower with a regular pair of scissors.
The rest of the card was fairly simple to put together. To make the face, use vanilla cardstock, certainly celery cardstock, a small piece of Au Chocolat Designer Series Paper, Copper Embossing Powder and Versamark. Adhere the DSP and randomly stamp the flower with versamark. Apply embossing powder, and heat set until dry.
I attached my copper piece to the vanilla square using a glue dot. This vanilla square was then attached to a celery square and mounted on the card face. The edge was torn, and attached to a certainly celery card base. Add the celery ribbon, with a touch of copper cord, and you’re done. My photo was taken in a very sunny window, so that’s why there’s a funny shadow across the card.
Here’s a picture of the tube of sheet metal:
 If you have any questions, please contact me! Thanks for the comment Allison!
Images © 1990-2007 Stampin’ Up!
